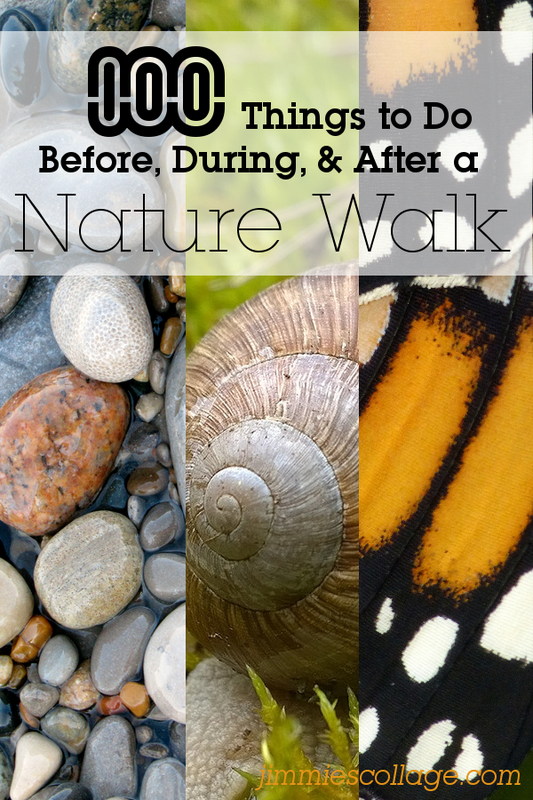
SUMMER FUN IDEAS

*One of the BEST draw along website*
Mr. Printables is a website that has all kinds of educational free printable from color wheels to 3-D paper art.
I highly recommend checking out this site for tons of summer fun!!
I highly recommend checking out this site for tons of summer fun!!

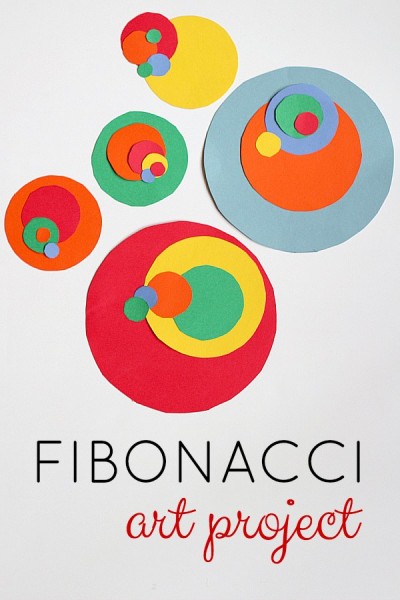
Fun art project that is very STEAMY!
Jellyfish Friendship Bracelets
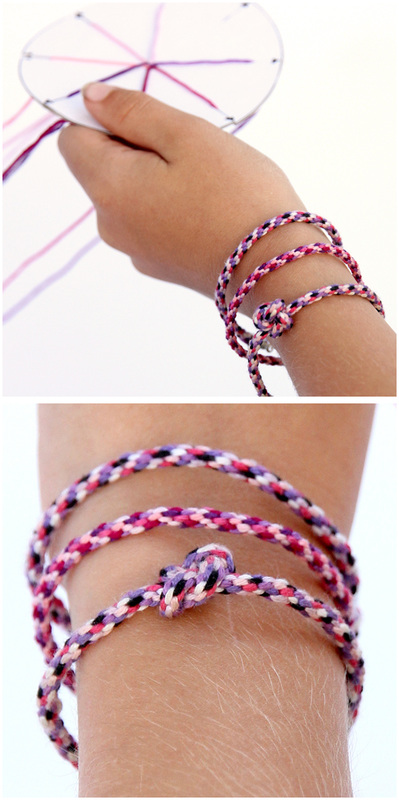
Finger Knitting or Weaving
All you need are your fingers and some yarn and you can knit a chain that is as long as you can imagine. Have fun and watch this favorite video I've found on how to finger knit.
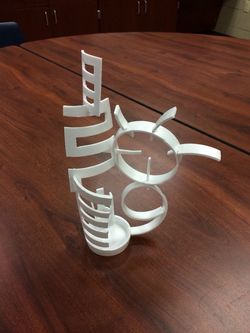
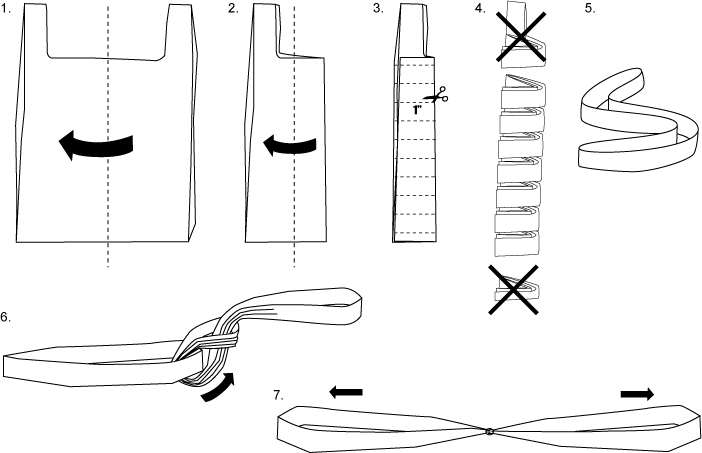
Paper SCULPTURES
Collect recyclables made of plastic and
paper to create sculptures of all kinds.
Here are some images to give you some ideas.
Collect recyclables made of plastic and
paper to create sculptures of all kinds.
Here are some images to give you some ideas.
|
|
Styrofoam cup sculpture idea! Wow! Do you think they used the whole cup? How about glue? |


Duct Tape Flower Topper
Washi Tape Paper Clip Bookmark
Chihuly Art sculptures or Homemade Shrinky Dinks
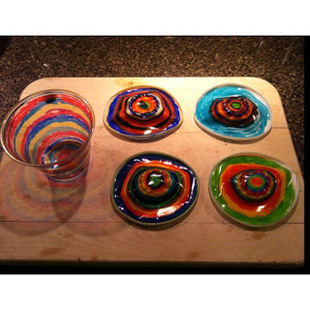
Sharpie and Solo cup stained glass found here. Supplies needed: Sharpies, clear plastic cups, hole punch, string/ribbon.
1) Color the cups with the Sharpies.
2) Place the cups on foil sprayed with Pam.
3) Melt the solo cup in a 350 degree oven for 3-4 minutes
4) Immediately after taking them out of the oven, pat them down to completely flatten them and make hole if desired.
1) Color the cups with the Sharpies.
2) Place the cups on foil sprayed with Pam.
3) Melt the solo cup in a 350 degree oven for 3-4 minutes
4) Immediately after taking them out of the oven, pat them down to completely flatten them and make hole if desired.
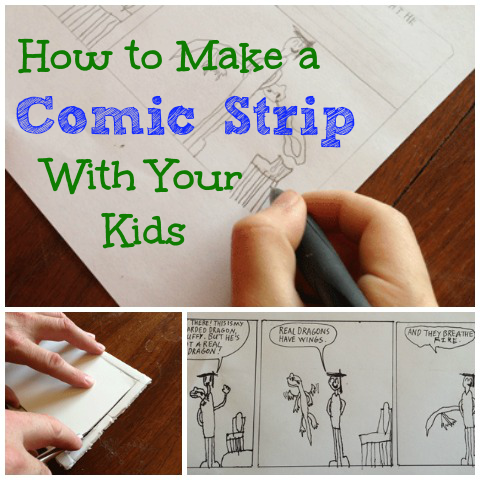
Back To Back Drawing Fun!

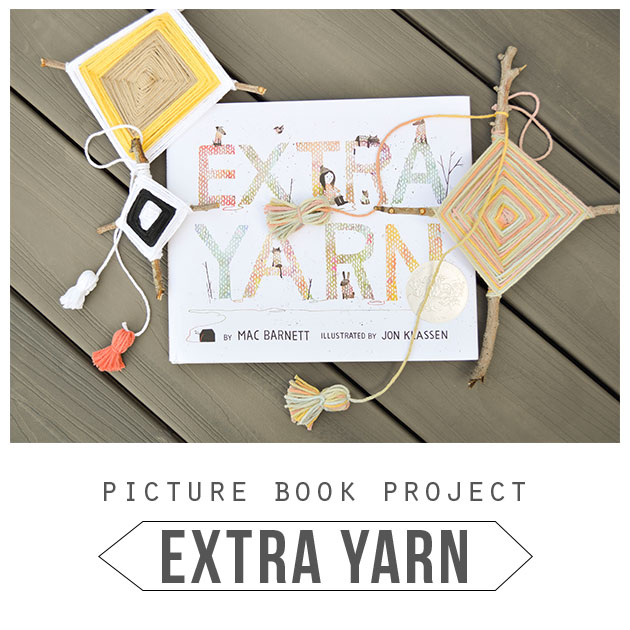
Blog site to make this fun Yarn Projects-http://playfullearning.net/2014/07/picture-book-projects-extra-yarn/
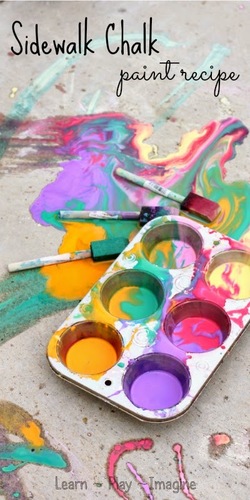
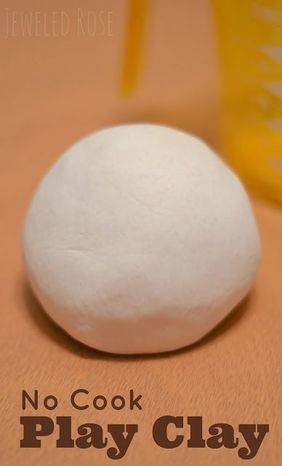
PLAY CLAY
No Cook Play Clay Recipe
1 cup of flour
3/8 cup of salt
3/8 cup of very warm water
Method
Combine ingredients in a bowl and mix well. Once mixed, knead the ingredients for 2-3 minutes, and then wash & dry your hands. Once hands are clean you will be left with the perfect play clay
No Cook Play Clay Recipe
1 cup of flour
3/8 cup of salt
3/8 cup of very warm water
Method
Combine ingredients in a bowl and mix well. Once mixed, knead the ingredients for 2-3 minutes, and then wash & dry your hands. Once hands are clean you will be left with the perfect play clay
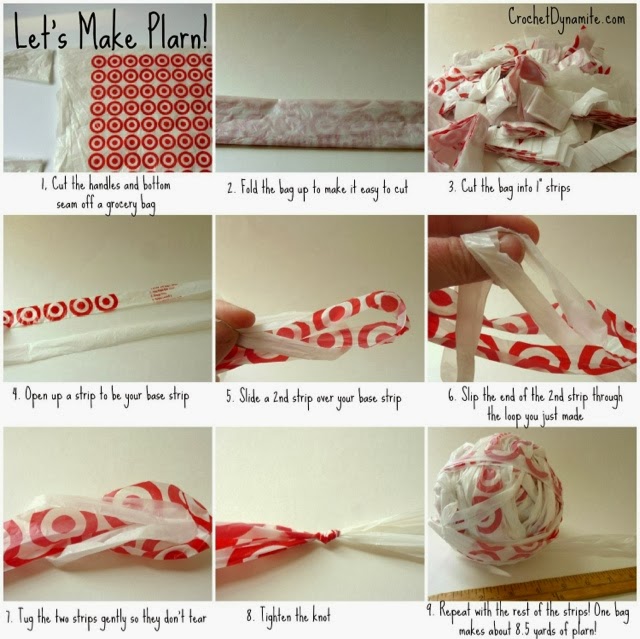
PLARN is using plastic bags to make a ball of plastic-yarn. With plarn you can weave all kinds of things. Finger weaving is a simple way to weave that kids just love. You can use plarn or any kind of yarn to finger weave.
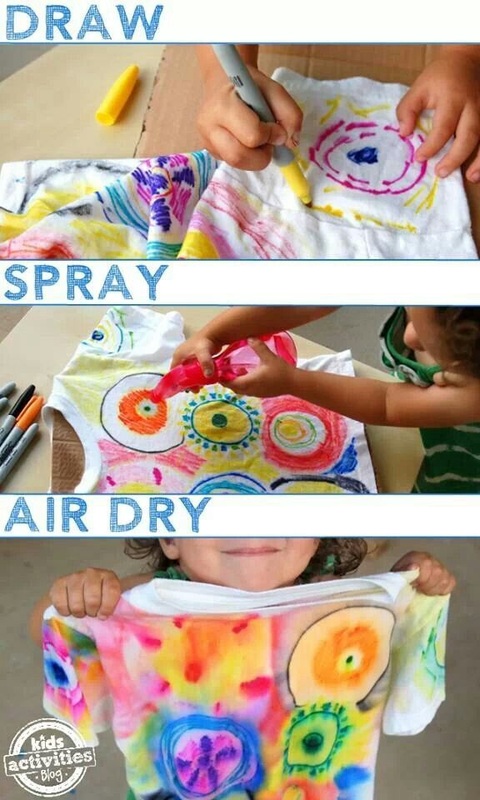
Sharpie Tie Dye Shirts
SUPPLIES and Directions
SUPPLIES and Directions
- Sharpie Markers in Blue, Red, And Yellow I recommend using a light blue! The dark blue doesn’t mix as well with other colors.
- Plain White T-shirts or T- shirt fabric
- Large Embroidery Hoop (10-Inch)
- Eye Droppers
- Plate
- Small Bowl
- Rubbing Alcohol
- Step One Use the embroidery hoop to tighten a section of fabric at the front of the shirt
- Step Two Use your red, yellow, and blue Sharpies to draw all over the shirt. Add a good layer of color. For the best color mixing demonstration you can use bull’s-eye designswith alternating red, yellow, and blue circles.
- Step Three When the design is complete, slip a plate inside the shirt under the embroidery hoop to catch any rubbing alcohol that may seep through.
- Step Four Pour rubbing alcohol into a small bowl. Using an eye dropper begin dropping rubbing alcohol on the t-shirt. If you have bull’s-eye designs drop the alcohol in the center of each bull’s-eye. Within seconds you will see more colors appear! Green, orange and purple should be visible as the ink bleeds and mixes with the other colors.
- Step Five Get that t-shirt really saturated! Alternatively use the rubbing alcohol in a controlled manner to bleed and blend only certain parts of the shirt. Now let dry.
- Step Six Once it’s dry remove the embroidery hop and iron your shirt.
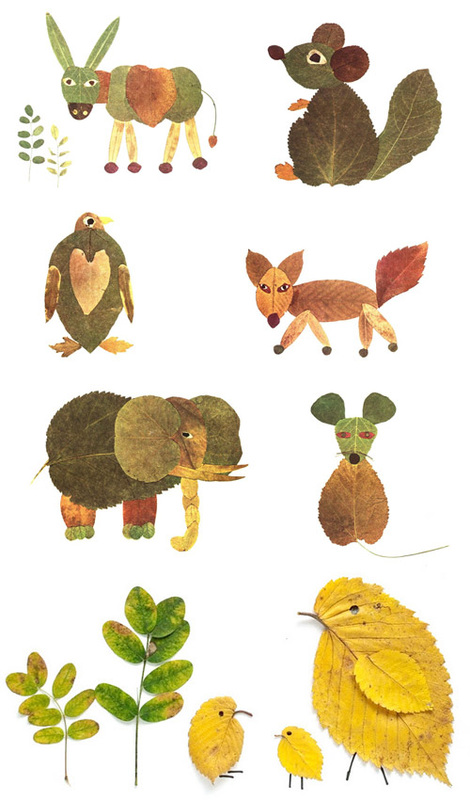
Look What I Can Do with a LEAF!